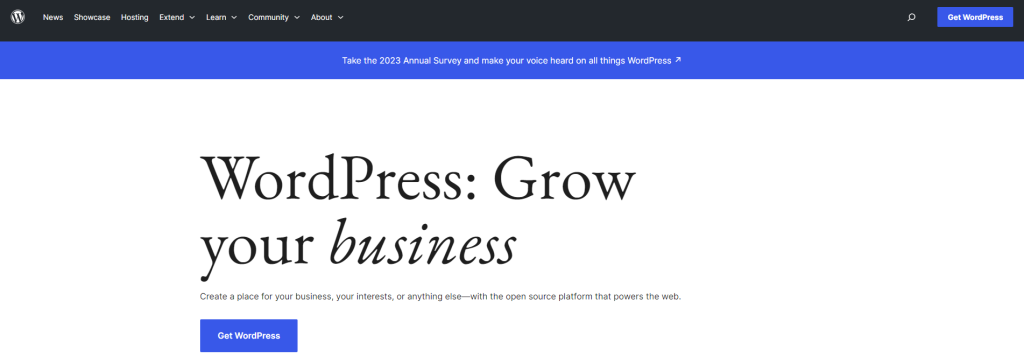
Since WordPress is by far the most widely used get started with WordPress website, you’ve made an intelligent decision. More than 40% of websites are powered by it, and that proportion is still growing!
Because of its supportive community and flexibility, WordPress is adored by users. It is open-source, free, and comes with hundreds of thousands of plugins that allow users to personalize the way it looks and the features of your website without needing any specialized technical skills.
But it can be difficult to know what steps to take to get your first WordPress website functioning correctly when you’ve only recently started.
How to Get Started With WordPress Website: A Step-by-Step Guide
- Select the domain name.
- Investing in web hosting
- Install the WordPress
- Set up your basic WordPress settings.
- Pick a WordPress theme.
- Set up the necessary WordPress plugins.
- Add your content.
- Check for additional applications as needed.
1. Select The Domain Name
Each website requires a domain name in order for users to be able to access it; it is the website’s definitive location on the internet. Your domain name is not just the address of your getting started with WordPress website; it is also a crucial part of your branding, so you should take some time to choose it carefully. What makes a domain name excellent, then? It varies.
You could wish to use your own domain name, like keanureeves.com, if you’re developing a personal portfolio. Alternatively, you should definitely use the name your company already has, such as walmart.com, if it has one. If not, you’ll have to come up with ideas to find the ideal name (we offer plenty of advice on choosing a domain name); alternatively, users can use domain name generators to get some ideas.
Although.com is still undoubtedly the most popular domain name extension, there are a multitude of other extensions accessible, and using one of them is getting more and more popular. The catch is that just one person can be the legal proprietor of certain domain names at a time. Once a domain name has been registered, it cannot be registered by anyone else (although the owner allows the registration to expire). As an example, purchasing Facebook.com is not feasible.
Because of this, you might discover that many of the names that you have in mind are already taken; you can check this with an instant domain search. If it occurs, you’re left with two options: use an entirely novel name or attempt an alternative extension (like.net instead of.com).
You must use a company that registers domain names to register the ideal domain name once you’ve found it. The registrar will choose the registration fee, but it typically ranges between $10 and $15 annually.
This is how to buy a domain name:
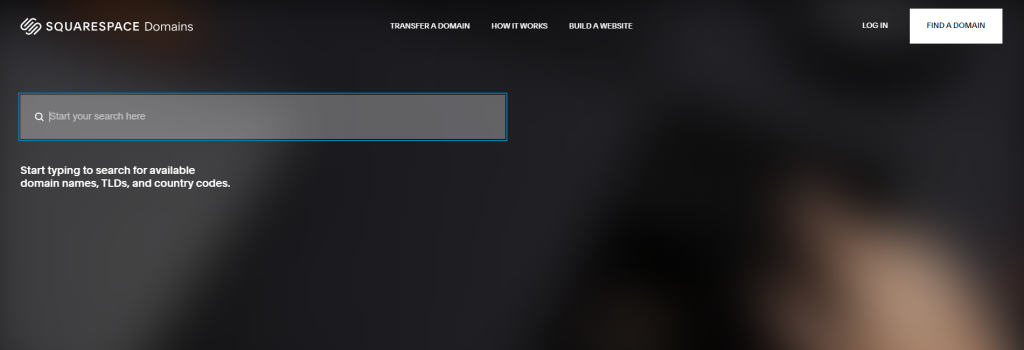
- Visit the Google Domains site now or you can buy Domain from sites like GoDaddy or Squarespace
- In the search box, type the name of your domain.
- To add something to your cart, hit the cart button.
- To complete your purchase, proceed to the payment page (you may use your current Google account).
2. Investing In Web Hosting:
You require web hosting in order to operate the get started with WordPress website software and enable accessibility for visitors to your domain name. You are basically renting computer space if you use web hosting to run your website.
Hosting is available for a wide range of budgets, from a few dollars to several hundred dollars each month. It’s suitable to go with inexpensive WordPress hosting if you’re just getting started with WordPress website because you are able to increase as your site expands. Visit SiteGround to get started, then select your plan (Startup or GrowBig are both excellent choices). If you are certain that you will only be creating one website, select Startup; when you believe you may wish to create more, utilize GrowBig.
Select I already possess a domain on the following screen, then type the name of the domain that you bought in the preceding step:
Next, complete the following details and make a payment for the hosting package:
You must change your domain’s owner to “point” your domain name to your SiteGround hosting once you buy hosting. It sounds complex, but all you really need to do is adjust the values between the two boxes.
Here’s how to link Google Domains and SiteGround if you have used them:
- Go to Google Domains and open your domain.
- Navigate to the domain’s DNS tab in the settings.
- Select the Custom Names Servers tab and, when necessary, turn it on.
- On the Custom name servers tab, select Manage name servers.
- If you’re utilizing SiteGround, add two separate nameservers, ns1.siteground.net and ns2.siteground.net.
- Press Save.
- Wait just a few seconds for the modifications to take effect. Although it may require up to 24 hours in theory, most domains function within 15 minutes.
3. Install WordPress.
After obtaining your hosting, users must install the necessary versions of WordPress. One of the good things about SiteGround, aside from its reasonable price, is that it makes this very simple task easy with an exclusive website installer. Following your hosting purchase, SiteGround will provide you with a simple wizard for installing the WordPress programme after you log in to the control panel for the first time.
Alternatively, you’re able to manually visit this wizard at a later time from your SiteGround dashboard’s Sites section: Following WordPress installation, go to yourdomain.com/wp-admin to access the dashboard for WordPress by entering your login information and password in the WordPress installation wizard. It’s time to add the finishing touches to your blog on WordPress.
4. Set up your basic WordPress settings:
To guarantee the success of your WordPress site, users should first set up a few fundamental settings. We’ll explore altering your site’s functionality and style in the sections to come.
Once you go through all of these options, you won’t really need to think about them anymore because they are all one-time decisions.
a. Add Permalinks (URL Structure) to Your Website:
The URL layout of your WordPress content is determined by your WordPress redirect settings. Permalinks, for example, determine where a blog post appears.
For example, yoursite.com/cool-blog-post and yoursite.com/2/8/cool-blog-post (include the day and month when entering the URL). Navigate to Settings > Permalinks on your dashboard to configure these.
They advise utilizing the post title option for the majority of WordPress sites as it provides a clear, simple structure. Unless you are starting an online newspaper that exclusively posts breaking news that needs to be viewed right away, we advise against using dates in URLs.
b. Ensure That the Public Can Access Your Site:
Make sure that your website is publicly available if you wish for someone else to be able to locate it in search engines like Google. Although it should be the default, it’s always a good idea to double-check because this is an extremely crucial setting!
To accomplish this, make certain the “Discourage search engines” box is not checked by going to Settings > Reading.
c. Pick a Website Time Zone:
Check that your website’s time zone is configured properly because it will impact planning, the publication dates of blog posts, and other things.
Here are two methods you can choose from based on which one suits you the best:
- Put your own personal time zone to use.
- Make use of the audience’s main time zone.
Navigate to Settings > General and select the preferred time zone using the Time zone box.
If necessary, users can also change the date as well as the time formats below that.
d. Configure the Comments on Your Blog Post:
Get started with the WordPress website, which, by default, lets anyone post comments on blog entries on your website. You may go to Settings > Discussion to change this behavior. Unchecking the “Allow users to post comments” option will deactivate comments.
It is also advised to eliminate the checkbox labeled “Allow link alerts from other blogs,” since spammers might take advantage of this feature. Because you have more advanced management of the comment areas on your site, you might also want to look into the other settings.
e. Rather Than Listing Blog Posts, Build a Static Home Page (Optional):
Get started with WordPress website to show a list of the most current blog entries on the homepage of your website. But many webmasters would rather make a specific homepage before they put the blog entries on another page, like yoursite.com/blog. You’re able to go to Settings > Reading to manage which of your pages is your blog’s main post and which is your homepage.
5. Pick a WordPress theme:

Your website’s look and layout are determined by how you get started with WordPress website theme. It’s crucial to take this into account because you would like your website to be user-friendly and appear professional.
There are a lot of “niche” WordPress themes available because you’ll additionally require them to complement the goal of your WordPress website. As an example, there are themes specifically designed for portfolios if you’re building a website for your work. In addition, you can locate specific food blog themes if you’re starting a food blog. and on for a plethora of distinct niches.
Selecting a “multipurpose” theme, which you may modify to fit a range of niches, is an additional choice. We actually recommend employing this generalist strategy when searching for a niche-specific theme starting in 2023.
Because of what? The vast majority of high-quality multipurpose themes come with hundreds of useful, importable starter sites. You therefore have a great deal of versatility when utilizing a “one” multipurpose theme that offers you more than 200 different layouts to pick from.
a. Select a WordPress Theme to Get Started With WordPress Website.
Two great places to look when you’re looking to explore other themes are:
- For free WordPress themes, visit the WordPress.org template directory.
- ThemeForest sells high-quality WordPress themes.
Additionally, there are a ton of excellent premium themes that are sold directly by developers. But if you’re uncertain where to begin, we strongly advise utilizing Astra. It is not only very popular and free; however, it also allows you to follow the rest of our lesson step-by-step rather than changing the instructions to fit an alternate subject (though that approach is still valid).
b. Set Up Your WordPress Theme:
After selecting the ideal WordPress theme, download it on your website by navigating to Appearance > Themes > Add New and choosing one of the following options:
- looking for the theme on WordPress.org to see whether it’s free.
- submitting a compressed file in the event that you bought a premium theme.
To obtain the complimentary Astra theme, follow these steps:
- Look up “Astra.”
- After highlighting the Astra result, select Install.
- Select the Activate button, which will appear in place of the Install button, after a little wait.
c. Modify the Layout of Your Website:
- You have the ability to alter the way your website looks.
- You will be customizing an imported website to suit your requirements.
- In the event that you opt for starting from scratch, you will be setting up all of the parameters from scratch.
- Navigate to Appearance > Customize to gain access to all of your theme’s customization options.
- This will open the current customizer. On the right will be an immediate preview of your website, and on the left side will be a sidebar with several settings.
- The sidebar has the following types of options, as examples:
- Select the header, blog share, blog listings page, and other designs that go with your theme.
- Manage the typography and fonts in your theme.
- Modify the colors that you use for specific elements and the overall site.
d. The Customizer Can Be Used as Follows:
- To access the settings for the choices that you wish to change, use the sidebar. Your theme will determine the specific settings, but they must be arranged rationally. For instance, you would search for an option and submenu that said “Colors” in order to adjust the colors of your theme.
- For theme adjustments, use the sidebar’s settings.
- The live display of your website ought to modify automatically as you make changes to the settings.
- To make your modifications live, select the blue Publish icon when you’re satisfied with them. Simply refresh the user interface (without saving) to restore your site to its previous state when you’re not satisfied with the modifications.
For instance, when you were using the Astra theme, you’d be able to go to Blog > Single Post and select from a variety of sidebars, content containers, and other design options.
e. Configure the Navigation Menu:
Most of the time, your website’s header contains your navigation menu. It facilitates users’ identification of and access to your site’s most crucial material. You may access your dashboard’s Appearance > Menus to manage your WordPress navigation menu.
It’s okay when your menu seems empty when you choose not to import a new site. In the following phase, you’ll discover how to add the main pages of your website and begin creating posts for your blog. Some of you can always return here afterwards to include those crucial pages in your navigation menu.
f. To Utilize the Interface, Follow These Steps:
Verify that the item’s location is defined, if it isn’t currently. Your theme will determine the precise location of the menu, but it should be near the “Primary” or “Main” buttons.
Include links in the menus by utilizing the interface. After adding a link, one can reorganize it by dragging and dropping. Another way to make drop-down menus is to drag a hyperlink under another link; you’ll see that the link will become recessed in the list of items as a result.
6. Set Up the Necessary WordPress Plugins To Get Started With WordPress Website:
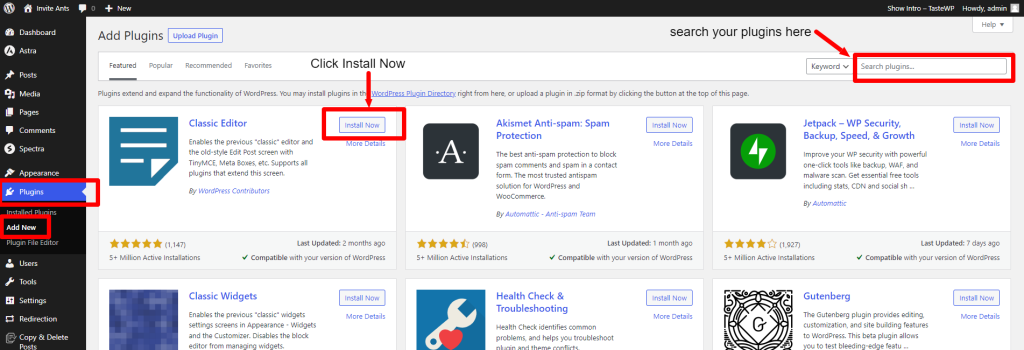
The appearance of your website is dictated by your theme, but WordPress plugins enable users to add additional features.
Plugins can add major features, like making the website an eCommerce store with full functionality, or tiny functions, like adding a contact page on WordPress.
Although there are several thousand paid and free plugins available, we’ll generally classify them into two groups:
- Essential plugins are required on every WordPress website elements, irrespective of its purpose.
- Plugins tailored to a certain niche that enhance features unique to your requirements Although they’re not necessary on each website, you might want them to provide more depth.
We’ll concentrate on the very first category in this section: the necessary plugins.
We think the following important plugins are a must for each WordPress website:
- Backup plugin: To ensure the safety of your data, you’ve got to periodically backup your website. For an additional fee, we suggest Jetpack Backup; for an entirely free option, we advise UpdraftPlus.
- Security plugin: Although WordPress’s core software is inherently safe, you can further secure your site by using a reliable WordPress security plugin.
- Plugins for engine optimization (SEO) can raise your website’s Google search engine ranking for pertinent inquiries. Rank Math and Yoast SEO are two excellent free solutions.
- Caching and performance plugins: These plugins help you achieve faster site loading times, which is essential. For an increased version, we suggest WP Rocket (see our review) or, for a free version, WP Fastest Cache.
Navigate to Plugins > Add New: in WordPress to install a plugin.
- You can look up a plugin by name on WordPress.org if it’s free.
- Installing a premium plugin with a zip file upload is possible for plugins like WP Rocket
7. Add Your Content to your WordPress Website:
You finished building the basis of your website at this stage. Installing WordPress, configuring your theme, and installing a few essential plugins can help ensure that your website has been optimized for search engines.
You are ready to start uploading your belongings. Your website’s “core” sections, including your homepage and “about” page, are an excellent spot to start. Following the conclusion of that, users may use WordPress’s blogging feature to create their first blog post.
There are two main editing experiences from which to choose when adding your content:
- Integrated WordPress editor: This editor is excellent for blog entries and basic webpages. It’s usually suggested to use it, as it will speed up the loading of your website.
- Page builder plugins: they are additional tools that provide a more visual, drag-and-drop design interface. They can be useful even for websites with landing pages and other pages that need greater design liberation, though we generally advise against using them for regular blog entries.
a. Use the WordPress Editor Integrated In:
The built-in WordPress editor should be the first thing you choose. To get to it, click Pages > Add New.
The native editor employs a “block” architecture that allows you to add basic layout settings and multimedia content. If the layout you’re after isn’t too complex, it’s a wonderful place to start and can be all you need.
However, you might want to use a page editor for the WordPress plugin if you’re looking for something with some additional design capability.
b. WordPress Page Builder Plugin Installation (Optional)
Using a straightforward drag-and-drop interface, you can design more intricate layouts by employing a page builder plugin. If you’ve ever used a website builder like Squarespace or Wix, a page-building plugin gives WordPress users an identical experience.
Although there are many excellent WordPress page-building plugins, we think Elementor (see our analysis) is a fantastic place to start because:
- It provides a packed-with-features free edition that lets you create intricate pages without spending any money.
- The UI is not too challenging to use.
This is an example of how you can build a page using Elementor:
Have you noticed the fact that you can see exactly how people will view your page? The main draw of page creator plugins is that they offer more style and layout possibilities and the ability to drag and drop elements.
8. Check for Additional Applications as Needed.
We walked you through a few of the important WordPress plugins that every website requires in Step 5. Still, you’ll certainly want additional plugins tailored to the needs of your website. Now is the time to start looking at plugins that will improve your website’s useful features. Alternatively, you might want an events calendar plugin when you host a lot of events. So, where can one locate these plugins?
The official WordPress.org plugins directory is an excellent place to start. With over 60,000 plugins, you’re sure to find something that works for your website. While many of those plugins are completely free, some have restricted free versions, while others offer additional features in exchange for a fee. In addition to WordPress.org, CodeCanyon has a huge variety of high-quality WordPress plugins.
FAQ:
- What is the simplest way to install WordPress:
Using a web host that offers a beginner-friendly interface and a single-click WordPress installation is the simplest method to get started with WordPress website. Utilize a multipurpose theme, like Astra and Kadence Theme, with importable example sites from there. Anyone may have a beautiful website with this method in less than an hour.
- How much time does a WordPress website need to be built:
A functional WordPress website may be set up in about 30 minutes. The remaining time will be spent on content creation and design adjustments, which may last as long as you’d like.
Conclusion
In today’s digital age, building your own website with WordPress is as easy as pie. The steps you’ve learned are like your first steps into an exciting online world. Now, what can you do with your new website? Well, you can do almost anything! You could start a blog to share your thoughts, sell things online, or create a place for your own ideas. You just need to select perfect Premium WordPress themes and setup your website and you are ready to go.
So, think about your dreams and use what you’ve learned to make them real. Your WordPress journey is starting, and the internet is your playground. So, go ahead, start making your website, and see where it takes you. Have fun creating!