Custom post types are one of the useful features in WordPress. If you are looking for a way to extend your favorite blogging platform into a full-fledged content management system then custom post types are useful for you.
By default, WordPress provides you with many built-in content types. The most known ones are posts and pages. Under it, they behave the same, but they give you the opportunity to organize the content of your site in a more reader-friendly manner.
In the most classic of examples:
- you can use pages to showcase the content that rarely changes and remains evergreen (such as About page or Contact page),
- Use posts to publish entries that might have an expiration date on them (like company news and blog posts).
But what if you need more? What if you want to publish other content that’s neither a page nor a post? That’s where you will need custom post types in WordPress.
In this blog, we are going to explain:
- What are custom post types
- When and why use them
- How to set them up in WordPress
What Are Custom Post Types?
Like we said earlier, WordPress provides you with a handful of content types by default. They are posts, pages, attachments, revisions, and navigation menus. We are not going to discuss the last three right now. They serve their purpose quietly in the background of WordPress, and they don’t require much attention.
Posts and pages are the most important of all!
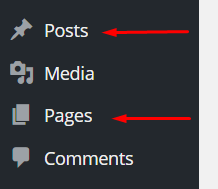
From a technical point of view, they work very much similarly, and the main difference between them is that posts can be accessed from your wp-admin through the Posts menu, while pages can be accessed through Pages.
These two have been the classic content types available in WordPress since always. But then, users were given a possibility to create their own content types, besides the standard posts and pages.
Such a new content type – defined by you – will show up in the wp-admin right below the Posts and Pages menus in the sidebar. Most importantly, you will be able to work with this new content type just like you would with posts and pages.
Why/when Would You Need To Use Custom Post Types?
Custom post types can help you in many ways, based on the type of content you want to publish on your WordPress site.
Most commonly, a new custom post type is a good idea when you simply want to start publishing (a type of content) that needs to be kept apart from posts and pages. In other words, you want to present that content neither as posts nor as pages.
Let’s see an example:
If you run a book review site then you can use a custom post type called books.
Having a separate section for books on your review site is going to make the content more readable for your audience, and separate those reviews from the rest of your content. Additionally, this will also enable you to set specific parameters for each book – such as author or genre – and show it alongside the review.
How To Create a New Custom Post Type In WordPress
Although it is possible to create your own custom post types by adding custom code to your WordPress site, this method requires some bit of technical know-how. An easier option that also gives you more flexibility is to use the free pod’s plugin, which is what we will do in the tutorial below.
Pods – Custom Content Types and Fields
It is available for free in the WordPress.org plugin directory, so you can install it from your dashboard.
Like all WordPress plugins, you will need to activate them as well. Make sure you do so before diving into the process below.
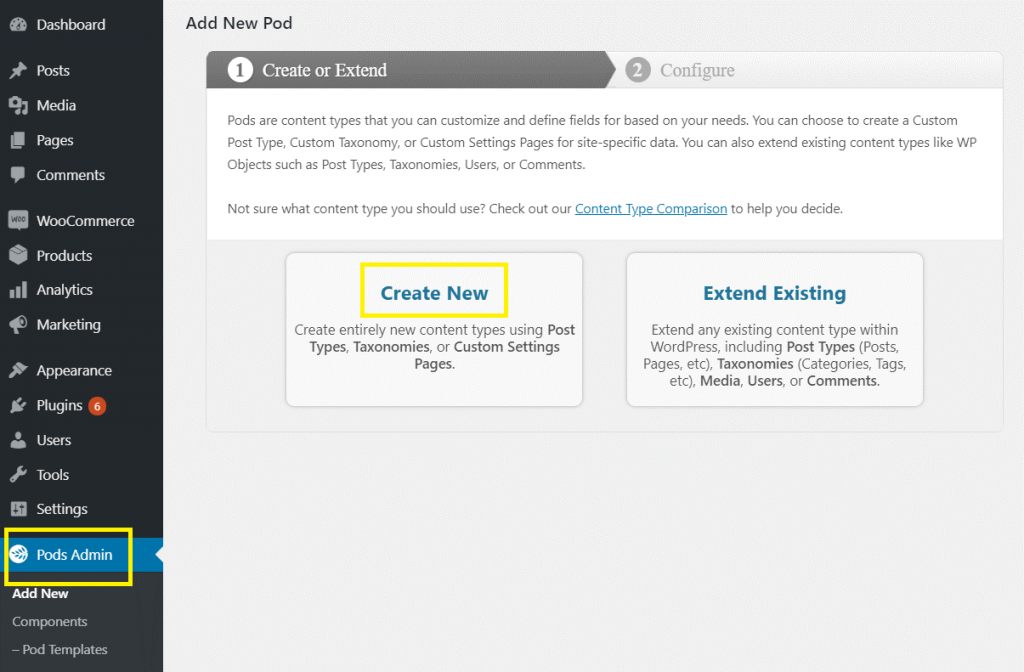
1. Add a New Custom Post Type
First, go to Pods Admin → Add New, and click on Create New to add your first custom post type:
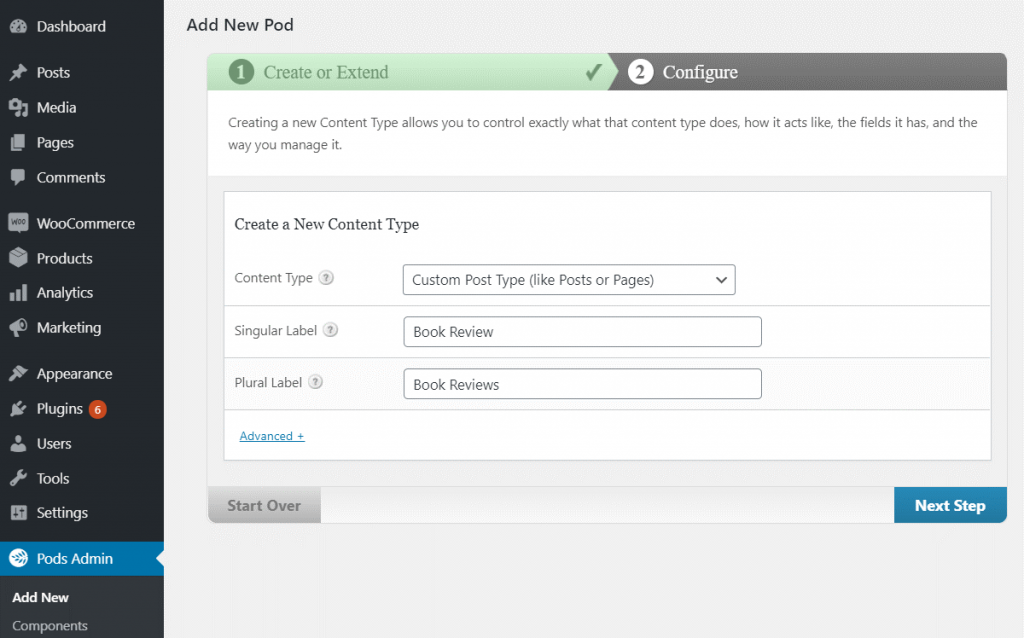
This will bring you to the next screen, which lists various content type options in a dropdown menu. Choose Custom Post Type, then enter its name in its singular and plural forms so that your label can display correctly in all situations.
In this example, we will create a new post type called ‘Book Review’:
Click on Next Step to continue. Now you can see your newly created label listed in your admin menu in the left-hand sidebar right away. However, there are still some other details you may want to configure before you start using it.
2. Add Custom Fields (optional)
If you want to include more metadata than what’s provided for basic WordPress posts, Pods enables you to do so by creating custom fields.
For example, for a “Book Review” custom post type, you might want to add custom fields for additional information like your review rating.
To add custom fields to your post type, navigate to Pods Admin → [Your Label Name]. Click on Edit, then Add Field. This will bring you to the Manage Fields settings:
In this section, enter details such as the field’s label, URL slug, description, and field type. In this case, we’re creating a custom field for ‘Rating’ and selecting Plain Number as the field type.
The Field Type dropdown menu also provides you with other options, such as Paragraph, Date / Time, and Plain Text. Users with coding knowledge can also add custom CSS in the Advanced tab.
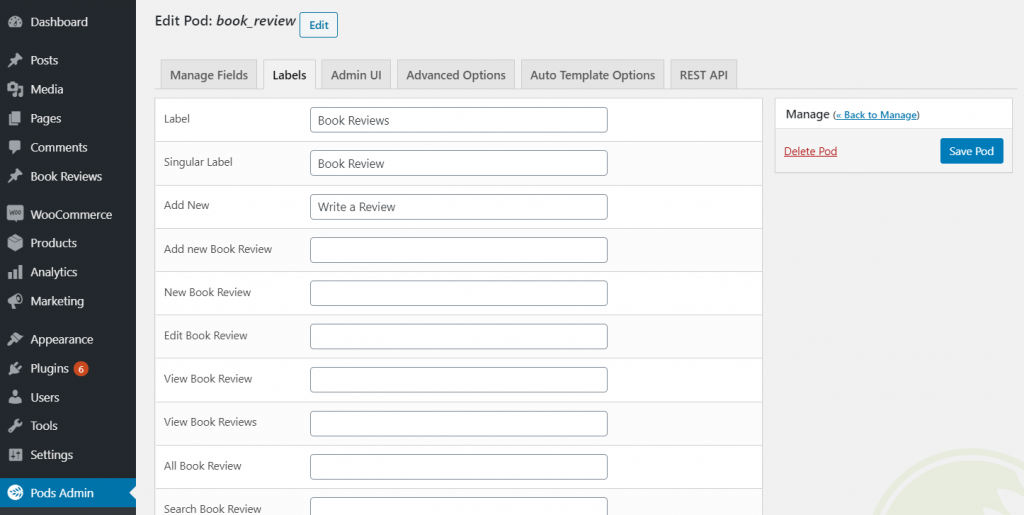
3. Configure Labels and Other Settings
If you want to customize how your labels show up in the admin area, you can do so from the Labels tab. For instance, you can change the default Add New button to read Write a Review or something that feels more intuitive for your custom post type:
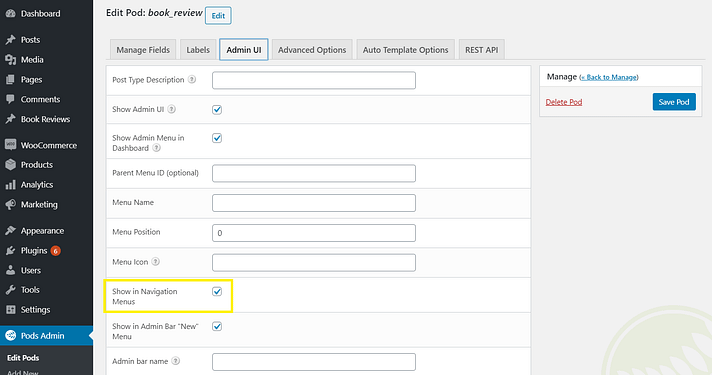
Next, the Admin UI tab helps you tune up your custom post type’s admin menu details. For instance, you can decide if it should appear in the dashboard sidebar or whether it should appear in the navigation menu:
Further, the Advanced Options tab enables you to exclude your custom post type from search, set its visibility to public or private, and more:
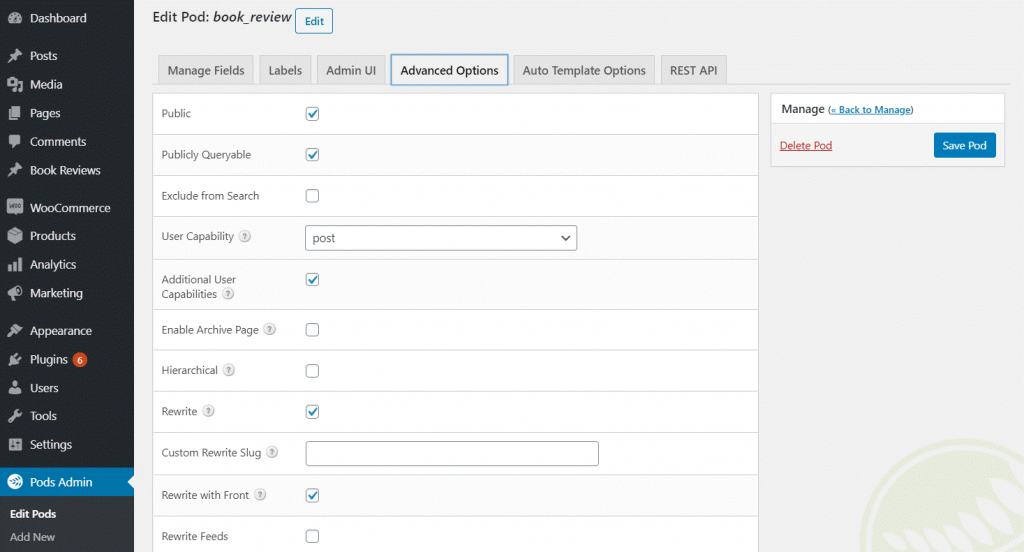
It’s worth exploring all of these settings as you might find something that’s useful for you.
For example, when you add content to your custom post type, Pods will use the Classic editor by default. To enable the Block editor, go to the REST API tab and check the box to enable the REST API (which also enables the Block editor).
Once you’re done with all your changes, click on Save Pod.
4. Add Custom Taxonomies (optional)
With custom fields, you can also create custom taxonomies for your post type, which behave similarly to post categories and tags.
The standard categories and tags in WordPress relate to posts, and not to your newly created custom post types. Therefore, it might be a good idea to create new taxonomies, particularly for those custom content types.
In a usage scenario, this will let you categorize your books. You can put some books in fiction, and others in non-fiction, for example, or however you want to categorize. For instance, you might want to add a taxonomy called ‘genre’ to organize your book reviews:
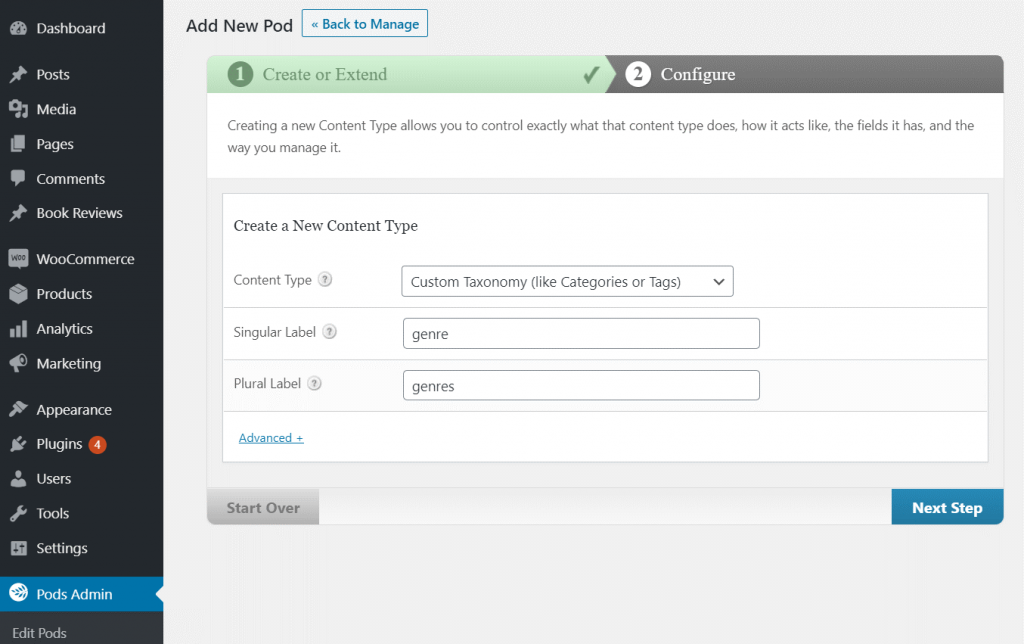
You can do so by navigating to Pods Admin → Add New. Then, select Custom Taxonomy from the Content-Type dropdown menu and repeat the steps above if you need advanced customization options.
5. Start Adding Content To Your Custom Post Type
Now that you have created your custom post type, you can start adding content via the Add New button (or your custom label name if you have changed it to something else). You will see a familiar post editor along with your custom fields if you have added any:
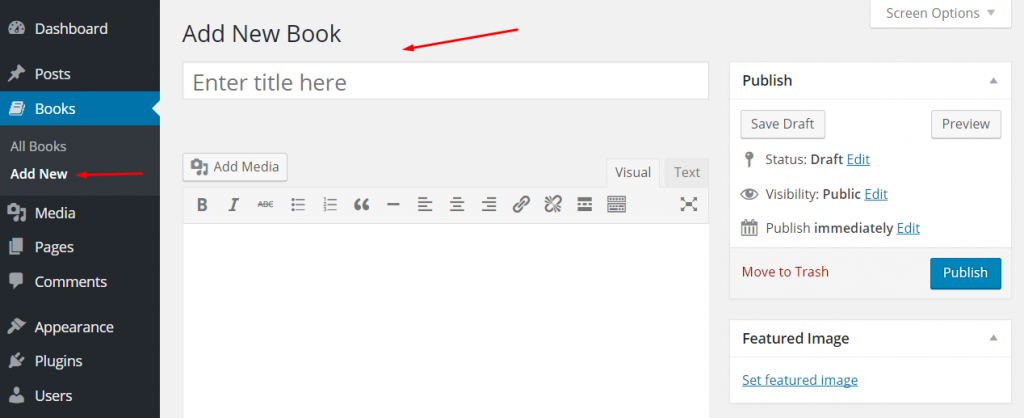
Let’s add an example book and see how this works out:
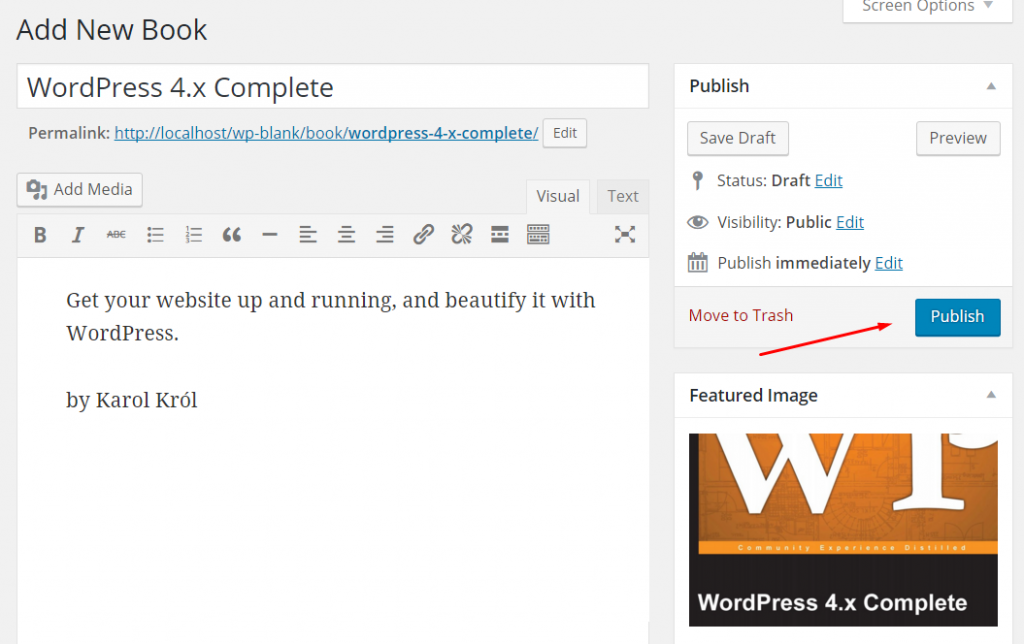
All we did here is added some basic book details, such as title, some quick description, a featured image (the cover), and click Publish.
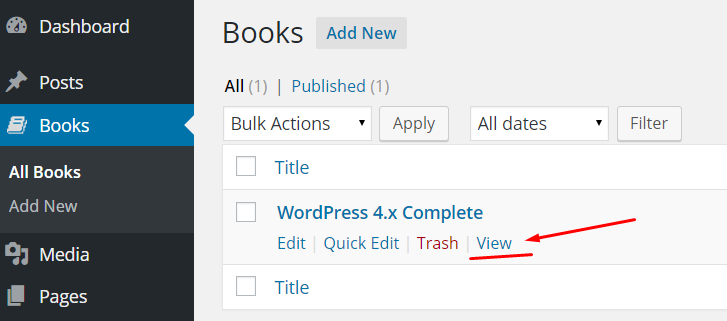
My book is now visible in the Books section, and I can also see it in all its glory by clicking the View link:
Here’s what it looks like on the site (our example setup uses the Twenty Fifteen theme):
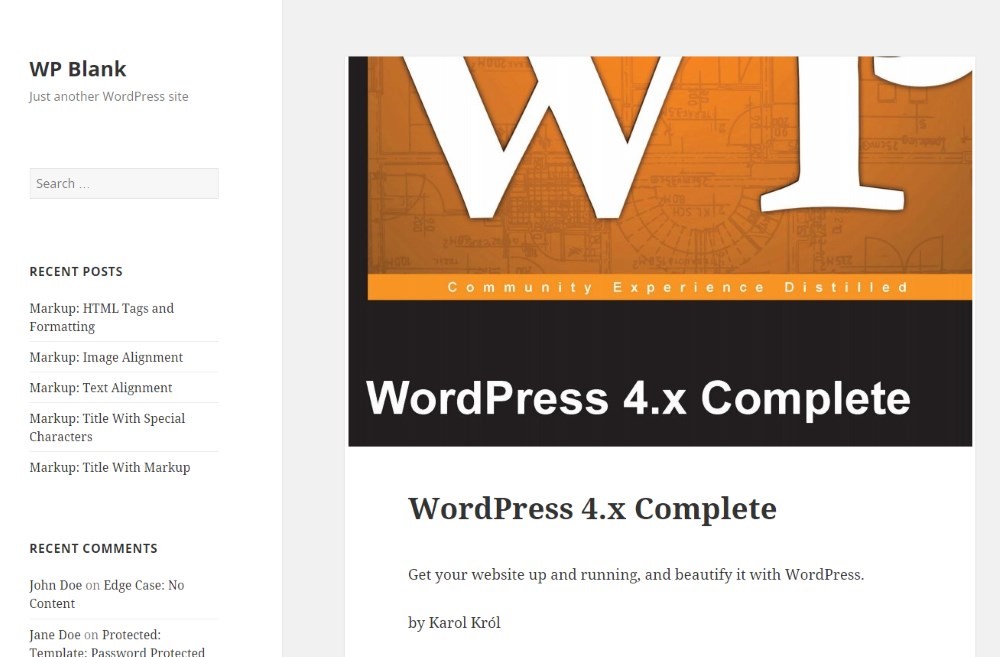
Quite nice, isn’t it?
Content from the title and editor will automatically appear on the front end of your site. However, if you want to display content from your custom fields, you will need to use Pods shortcodes or templates.
Conclusion
So, custom post types are a great way to add new content types to your WordPress site.
You can use those content types for any purpose, and whenever you find yourself in a situation when you want more content types than just posts and pages. Also check out our new blog on WordPress tips are bound to make an impact on your business to know more.
For instance, as we did here, you can start publishing book reviews, product Infos, movie ratings, or whatever else you find interesting. That’s the whole objective – using WordPress in a way that suits all your needs.
Try our premium WordPress themes at a very affordable price to design a website exactly you have imagined! Also, check out our WP theme bundle! This package includes 55+ premium themes, and it’s available at a fraction of the cost of purchasing them individually. So what are you waiting for? Try it Today.